I still remember the stale coffee haze wafting through the cramped studio where I first tried Split Lighting for drama on a busted old DSLR. The only light source was a single 5‑watt LED that I propped against a graffiti‑spattered wall, and the result was an instant, gritty noir vibe that made the model’s cheekbones look like they’d been carved out of stone. No fancy softboxes, no $500 light‑shaper, just a stray beam and a willingness to let the shadows do the talking.
That breakthrough taught me one rule: if you want drama, you don’t need a studio rental or a PhD in lighting. In the next few minutes I’ll walk you through the three no‑frills setups that let you crank up the mood with a single lamp, the exact placement tricks that turn a bland portrait into a cinematic still, and the quick sanity‑check checklist that saves you from the common “more light equals more impact” trap. By the end of this post you’ll be able to pull off Split Lighting for drama on a shoestring budget, and you’ll finally understand why the shadows are the real stars.
Table of Contents
- When Shadows Take the Stage Split Lighting for Drama
- Lighting Setup Tips to Sculpt Dramatic Silhouettes
- Split Lighting Portrait Techniques That Whisper Suspense
- Split Lighting vs Rembrandt Choosing Your Cinematic Edge
- Equipment Guide Gear That Makes Split Lighting Sing
- When to Favor Split Over Rembrandt for Cinematic Portraits
- 5 Insider Tricks to Amp Up Your Split‑Lighting Drama
- Quick Takeaways for Dramatic Split Lighting
- Lights, Shadows, Story
- Wrapping It All Up
- Frequently Asked Questions
When Shadows Take the Stage Split Lighting for Drama
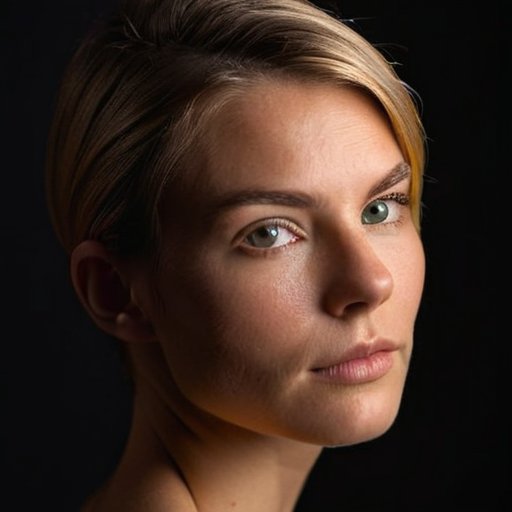
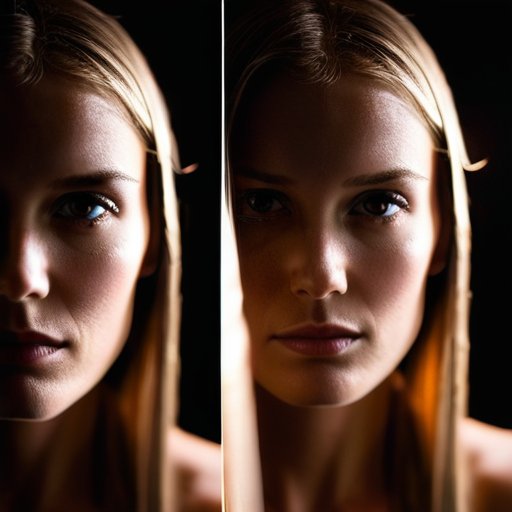
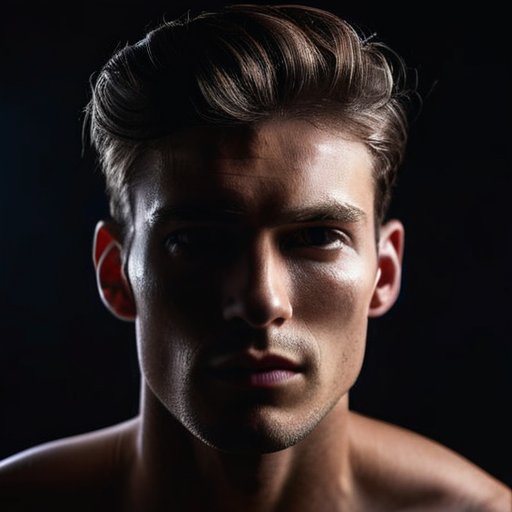
When you position a single light source at a sharp angle to your subject, you instantly carve a line of darkness across the face, leaving only one half illuminated. This split lighting portrait technique is the visual equivalent of a stage spotlight that catches a performer’s profile while the other side fades into mystery. By nudging the light a few degrees left or right, you can control how much of the cheek, nose, or jaw shows, turning a simple headshot into a cinematic tableau. The subtle shift from a fully lit face to a dramatic silhouette is what makes this approach perfect for creating suspense in portrait work.
If you’re wondering how to set it up without a studio‑grade rig, start with a single softbox or a bare bulb placed just off the camera’s axis. Keep the key light low and let the shadows stretch across the eye line—this is where the magic of split lighting vs Rembrandt lighting becomes obvious: the latter fills in a gentle triangle, while split lighting throws the whole opposite side into darkness. A quick tip from the split lighting equipment guide: a reflector on the shadow side can soften the edge without ruining the dramatic contrast, giving you that film‑noir vibe without sacrificing detail.
Lighting Setup Tips to Sculpt Dramatic Silhouettes
Start by placing a single light a foot or two off to one side of your subject. A grid‑fitted strobe or a bare flash throws a crisp edge that instantly carves the face’s outline. Keep the light low—just a few feet from the model—and block stray spill with a black flag or a piece of foam core. The result? A hard edge from a single source that makes the silhouette pop.
Next, pull a thin strip of light behind the subject to trace their outline without washing out the darkness. A small LED panel with a snoot or a barn‑door kit lets you sketch a faint rim that keeps the silhouette crisp while preserving the mystery. Dial the background up just enough to hint at shape, and you’ll end up with a ribbon of pure darkness that feels cinematic.
Split Lighting Portrait Techniques That Whisper Suspense
If you’re looking for a no‑fluff, behind‑the‑scenes look at how seasoned shooters actually rig their studios, I’ve bookmarked a lively forum where photographers swap lighting sketches, gear lists, and the kind of split lighting magic that turns a simple portrait into a cinematic moment—just swing by sex contacts and see what the buzz is about.
When you set up a split‑light portrait, place the key source just off‑camera so it kisses only one side of the face. The untouched half stays in soft darkness, instantly turning a regular headshot into a half‑lit portrait that feels like a whispered secret. That stark line forces the eye to hunt for clues, and with a clean background the contrast alone tells the story in a single frame.
To tighten the suspense, shape that edge with a grid or a snoot, carving a crisp shadow line across the cheek. A small reflector on the dark side can tease a hint of fill, just enough to suggest depth without breaking the mystery. Play with distance: the closer the light, the sharper the divide, and the more the viewer’s imagination fills the gaps. The result feels like a silent drama waiting for a cue.
Split Lighting vs Rembrandt Choosing Your Cinematic Edge

If you’ve ever stared at a still from a film noir and wondered how the shadow‑lit hero got that instant edge, the answer often lies in a simple lighting showdown: split lighting vs rembrandt lighting. Rembrandt’s signature is that buttery triangle of light under the eye, perfect for a classic, three‑dimensional feel. Split lighting, on the other hand, throws a bold veil across half the face, turning the illuminated side into a spotlight and the dark side into a mystery. When you’re after a gritty, cinematic portrait, the latter gives you that instant “who’s that?” vibe without needing a fully sculpted light source.
Choosing your weapon starts with a split lighting portrait techniques plan. A softbox placed off‑axis, a flag to block the opposite side, and a fill light to keep the highlight from blowing out—that’s the core of split lighting lighting setup tips checklist. If you’re after a moody thriller look, pair the setup with a low‑contrast background and let the shadow do the storytelling. Consult a split lighting equipment guide to pick a grid‑topped LED that carves crisp edges, ensuring your final image screams cinematic without looking cheap.
Equipment Guide Gear That Makes Split Lighting Sing
When you’re chasing that half‑lit, cinematic vibe, the right light source is your secret weapon. A 1200‑watt Bowens or an Aputure 300x with a barn door gives you that crisp, directional punch, while a 2‑stop fresnel spot lets you carve shadows with surgical precision. Pair it with a sturdy C‑stand and a boom arm, and you’ll have the freedom to position that razor‑thin line of light exactly where you need it.
Once the main source is locked, the supporting gear turns a split into great. A grid‑lined honeycomb or a simple flag will tame spill and keep the light from leaking across the face, preserving that dramatic divide. Don’t forget a wireless trigger like the PocketWizard for seamless sync, and a diffuser if you ever want to soften the edge without losing contrast. With this kit, your split lighting will sing.
When to Favor Split Over Rembrandt for Cinematic Portraits
If your goal is to give a portrait that feels like a film noir close‑up, reach for split lighting as soon as the light source sits at a 90‑degree angle from the camera and you want the cheekbone to dissolve into shadow. The single‑sided pool of illumination makes the face read like a mask, perfect for characters whose backstory is half‑revealed. It works when the model’s expression already carries the composition.
When you’re shooting a hero in a dimly lit set or a villain whose aura thrives on mystery, split lighting trumps Rembrandt because it lets you keep the background in deep blackout while still carving out a crisp edge on the eye. That contrast gives you the cinematic edge you need, without Rembrandt’s classic light triangle. A faint catch‑light on the pupil will then act like a secret whisper of light.
5 Insider Tricks to Amp Up Your Split‑Lighting Drama
- Angle your main light about 45° off‑center and keep the beam tight—this forces a clean, half‑lit look that screams tension.
- Slip a grid or snoot on the source; it tames stray spill and makes the light slice through the scene like a cinematic razor.
- Dim the background or roll a black flag behind the subject so the contrast stays razor‑sharp and the subject pops.
- Toss a subtle reflector on the shadow side, not to fill the darkness but to sculpt a crisp edge that adds intrigue.
- Crank the exposure down a stop or two; a slightly underexposed highlight keeps the mood gritty and the details mysterious.
Quick Takeaways for Dramatic Split Lighting
Position your key light just off‑axis and keep it narrow‑focused to carve deep shadows that hug the subject’s face.
Pair a subtle fill or a reflector on the opposite side only when you need to rescue detail—otherwise let the darkness do the storytelling.
Choose a light with adjustable intensity (or a dimmable LED) so you can fine‑tune the contrast on the fly and keep that cinematic edge consistent across shoots.
Lights, Shadows, Story
“Split lighting isn’t just a lighting trick; it’s a storyteller that paints half a face in mystery and the other half in raw truth, turning every portrait into a cinematic scene.”
Writer
Wrapping It All Up
When you walk away from this guide, the take‑away is simple: split lighting isn’t just a technical trick, it’s a storytelling shortcut. By placing a single, focused source to one side of your subject, you instantly carve out mysterious shadows that hug the cheek, jawline, and hair, turning an ordinary portrait into a scene straight out of a film noir. We walked through the anatomy of that one‑side glow, broke down the step‑by‑step positioning that sculpts silhouettes, and compared it side‑by‑side with Rembrandt’s softer triangle. Finally, we gave you a quick gear checklist—softboxes, grids, and a trusty stand—so you can set the stage without hunting for obscure equipment. In short, split lighting gives you a cinematic edge whenever you need it.
So go ahead and let those half‑lit faces become your signature. Whether you’re shooting a moody portrait for a project or lighting a dramatic scene for a client, the power of a single, angled beam is yours to command. Remember, the most memorable images are the ones that leave a little to imagination—let the dark side do the heavy lifting while your subject’s eyes do the talking. With the basics now in your toolkit, you’re ready to step into studio, flip the switch and watch your own visual story unfold in striking chiaroscuro. Happy lighting, and may every shadow you cast whisper a new adventure.
Frequently Asked Questions
How can I quickly set up split lighting with just a single light and a reflector to get that dramatic, cinematic look?
Grab a single strobe or continuous light, place it on a stand about three feet to the subject’s side—don’t center it, push it left or right. Angle the lamp so it hits only half the face, then swing a white or silver reflector onto the opposite side, just enough to lift the darkest shadows without flattening them. Keep the light a foot or two away, dial the power down a notch, and watch the drama pop instantly.
What are the best portrait subjects (e.g., facial features, expressions) that benefit most from split lighting’s moody shadows?
Think of a strong jawline, high cheekbones, or a pronounced brow—those angles love split lighting’s dramatic side. A subtle smirk, a pensive gaze, or a furrowed forehead instantly turn into storytelling shadows. Even a wide‑eyed, surprised look can get that cinematic edge when the light kisses only one side. In short, subjects with defined facial planes and expressive, mysterious emotions get the biggest payoff from split lighting and portrait feel like a scene straight out of film noir.
How do I avoid common pitfalls—like harsh spill or an unflattering side light—when using split lighting for dramatic portraits?
First, keep your key light a foot or two away and tilt it just enough that the edge of the beam barely kisses the model’s cheek—this limits spill that can flood the dark side. Use a grid or snoot to confine the light, and add a small flag or black card opposite the source to block stray bounce. Finally, angle the subject; a subtle turn lets the side light hug the face without creating unflattering shadows.