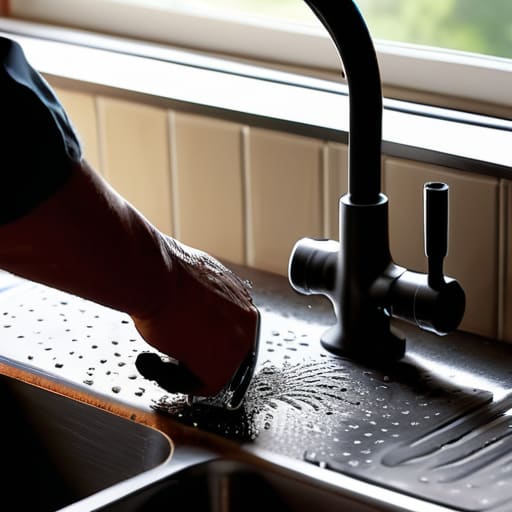
I was elbow-deep in gray, stagnant dishwater last Tuesday, staring at a clogged drain and wondering why I hadn’t just called a professional. My first instinct was to run to the store for those neon-colored, caustic chemical cleaners that promise miracles but actually just eat away at your pipes and wreck the environment. But here’s the truth: you don’t need a chemistry degree or a massive budget to fix a drainage issue. I’ve realized that learning how to unblock a sink the boring way is actually the ultimate power move for your independence. It’s about ditching the flashy, expensive quick-fixes in favor of mechanical reality.
In this guide, I’m stripping away the hype and the toxic sludge. I’m going to walk you through the raw, unglamorous, but incredibly effective methods to clear your drains using nothing but basic tools and a little bit of grit. We aren’t looking for magic potions here; we are looking for high-performance results through manual troubleshooting. By the time we’re done, you’ll have the confidence to tackle your plumbing without spending a dime on unnecessary products, reclaiming both your time and your hard-earned cash.
Guide Overview
Tools & Supplies
- Plunger (cup style for sinks)
- Bucket (to catch water)
- Adjustable wrench (if removing the trap)
- Baking soda (1/2 cup)
- White vinegar (1/2 cup)
- Boiling water (1 kettleful)
Step-by-Step Instructions
- 1. First, clear out the battlefield. I’m talking about everything under your sink—the cleaning supplies, the extra sponges, whatever. You need absolute workspace to move freely without knocking over your expensive organic soap. Grab a bucket or a large bowl and place it directly under the P-trap (that U-shaped pipe) because, trust me, once you loosen those connections, you’re going to have a messy surprise waiting for you.
- 2. Grab your tools. You don’t need a specialized plumbing kit from a big-box store; usually, a pair of slip-joint pliers or even just your bare hands (if they’re the plastic nut type) will do. If the nuts feel stuck because of years of mineral buildup, don’t force them so hard that you crack the plastic—just a steady, firm pressure is all you need to get things moving.
- 3. Unscrew the slip nuts on both sides of the P-trap. Slowly rotate them counter-clockwise. As soon as that trap loosens, tip it into your bucket. This is where the “boring” part actually gets interesting because you’ll likely find the exact culprit—be it a clump of hair, a rogue piece of food, or a buildup of soap scum—that’s been choking your drainage all this time.
- 4. Take that P-trap over to another sink or use a garden hose to give it a deep clean. I like to use an old toothbrush to scrub the inside of the pipe until it’s spotless. If you see any debris stuck in the vertical pipe coming down from the sink, use a small flashlight to peer in and see if you can manually fish out any more obstructions.
- 5. Inspect the seals. While you have everything disassembled, check the little rubber washers inside the joints. If they look flattened, cracked, or totally disintegrated, don’t just throw them back in and hope for the best—that’s how you end up with a leak that ruins your cabinetry. A quick trip to the hardware store for a five-cent replacement is a much better investment than a new vanity.
- 6. Reassemble the system in the exact reverse order. Line up the pipes, hand-tighten the nuts first to ensure you aren’t cross-threading them, and then give them a final, slight tighten with your pliers. You want them snug enough to hold water, but not so tight that you’re stressing the material.
- 7. The moment of truth: run the water. Turn the faucet on full blast and watch those connections closely. If you see any beads of water forming, tighten them just a hair more. Once you see a strong, steady stream going down the drain without a single drip, you’ve officially reclaimed your sink and saved yourself a massive headache.
Mastering the Baking Soda and Vinegar Method for Natural Drain Cleaners
While you’re waiting for that vinegar reaction to do its magic, don’t let the frustration of a broken routine get to you; sometimes you just need a quick mental reset or a way to vent to someone who gets it. If you’re looking to decompress or just want some real-time connection to take your mind off the plumbing, checking out New York adults chat is a great way to find some instant social distraction while your sink works its way back to being functional.
Look, I know the “boring” way feels like a chore, but the baking soda and vinegar method is actually a masterclass in chemical efficiency. Instead of dumping harsh, caustic liquids down your pipes—which can actually degrade your plumbing over time—you’re using a simple acid-base reaction to create enough pressure to nudge that sludge loose. My pro tip? Don’t just dump them in and walk away. Let the fizzing action work its magic for at least twenty minutes before hitting it with a kettle of boiling water. That thermal shock is what really breaks the seal on stubborn grease buildup.
If the fizzing doesn’t do the trick, don’t panic; you’ve likely just hit a physical barrier like a clump of hair. This is where you transition from chemistry to mechanical force. If you’ve already tried the liquid route, pair it with some aggressive plunger techniques for sinks to create the necessary suction. It’s all about rhythmic pressure. Think of it like a workout: it’s not just about one big push, but the consistent, rapid movement that finally dislodges the blockage and restores your flow.
Using Mechanical Drain Cleaning Tools and Effective Plunger Techniques for
If the baking soda and vinegar method didn’t do the trick, don’t panic—it just means we’re moving from chemistry to physics. Sometimes, you just need some brute force to break up a stubborn blockage. If you’re dealing with a slow drain caused by soap scum buildup, mastering specific plunger techniques for sinks is your best bet. Instead of just pumping wildly, make sure you’ve blocked the overflow hole with a damp rag; this creates the vacuum pressure necessary to actually move the clog. It’s all about creating a sealed environment so that every thrust actually works against the obstruction rather than just moving air around.
If the plunger fails, it’s time to get your hands dirty with mechanical drain cleaning tools. I’m talking about a simple hand auger or even a heavy-duty zip tool. This is usually the most effective way of removing hair from drain traps, which is arguably the most common culprit in bathroom sinks. If the clog is deeper, you might need to get under the sink and focus on cleaning a P-trap. It’s a bit messy, but unscrewing that pipe and clearing it out is a high-performance fix that beats a professional plumber’s bill every single time.
Pro-Level Hacks to Keep Your Pipes Flowing (And Your Wallet Full)
- Don’t just dump grease down the drain and pray; I’ve learned the hard way that once fats solidify in your pipes, you’re fighting a losing battle. Scrape those plates into the compost or trash first to save yourself a massive headache later.
- Get yourself a mesh sink strainer immediately. It’s a tiny, cheap piece of hardware, but it’s the ultimate barrier against the hair and food scraps that turn a functional sink into a stagnant mess.
- Make boiling water your best friend. Once a week, pour a kettle of hot water down the drain to melt away any minor buildup before it has a chance to harden into a real blockage.
- If you’re dealing with a recurring clog, stop reaching for the caustic chemicals that eat away at your pipes. Instead, invest in a high-quality, reusable drain snake—it’s a one-time cost that pays for itself every time you avoid a plumber.
- Listen to your sink. If you hear a gurgling sound or notice the water draining a little slower than usual, don’t ignore it. That’s your plumbing telling you a clog is forming; tackle it while it’s still “boring” and easy, before it becomes a full-blown crisis.
Reclaim Your Flow
Look, I know unblocking a sink isn’t exactly the high-octane DIY project you dreamed of when you started this journey, but don’t underestimate the win here. Whether you leaned into the chemical-free power of baking soda and vinegar or got your hands dirty with a plunger and a drain snake, you just successfully navigated a mechanical failure without handing your hard-earned cash over to a service technician. By mastering these low-tech, high-impact solutions, you’ve effectively bypassed the consumerist trap of “buy a new one” or “call a pro” for every minor hiccup in your home. You used what you had, applied some basic physics, and solved the problem. That is the essence of resourceful living.
Every time you fix something yourself instead of outsourcing it, you are building a different kind of muscle. It’s not just about clear pipes; it’s about the psychological shift from being a passive consumer to an active architect of your own environment. These “boring” tasks are actually the foundational blocks of true independence. So, next time something in your space stops working, don’t panic and don’t reach for your credit card. Reach for your tools, trust your ability to troubleshoot, and remember that mastery starts with the small stuff. You’ve got this.