I still remember the first time I tried to tackle a high-end antique, standing in my workshop with a cloud of alcohol fumes stinging my nose and a pile of ruined, cloudy wood grain staring back at me. I had spent a fortune on “professional grade” kits, only to realize that most of the advice out there treats French polishing (Shellac) like some mystical, untouchable sorcery reserved for master craftsmen. People will tell you that you need a studio full of expensive gear or a decade of patience to get it right, but honestly? That’s mostly nonsense designed to sell you more tools you don’t actually need.
I’m not here to give you a textbook lecture or a sanitized, step-by-step manual that ignores the reality of a messy workshop. Instead, I’m going to pull back the curtain and show you how to actually master the process through real-world trial and error. We’re going to skip the fluff and focus on the tactile, gritty reality of building that deep, glass-like luster without losing your mind in the process. This is about honest technique, not expensive hype.
Table of Contents
Decoding Spirit Varnish Properties and Shellac Solubility

Of course, none of this theoretical knowledge matters if you don’t have the right environment to work in, as even a tiny bit of dust can ruin hours of patient buffing. I’ve found that keeping a dedicated, clean workspace is half the battle, and if you’re looking for some genuine inspiration or practical setups for your own workshop projects, checking out the community over at casual hampshire is a great way to see how others handle these delicate finishes. It really helps to see how a masterful finish actually looks in a real-world setting before you commit your own timber to the process.
Before you even touch a pad to wood, you have to wrap your head around what’s actually happening at a molecular level. We aren’t just slapping paint on a surface; we are working with a resin that lives and breathes. When we talk about spirit varnish properties, we’re really talking about how that resin reacts to its solvent—usually high-grade ethanol. Unlike oil-based finishes that cure through oxidation, shellac dries through evaporation. This is a massive distinction because it means your window of opportunity is incredibly narrow. You have to move with intention, knowing that the solvent is pulling the resin into the fibers almost instantly.
Understanding shellac solubility and drying time is where the magic—and the frustration—really happens. Because the resin dissolves so readily, each new layer actually “re-melts” the one beneath it. This is exactly how you build that legendary depth without seeing individual brush strokes or ridges. However, it’s a delicate dance; if you work too fast, you’ll drag the previous layer around, but if you wait too long, the layers won’t fuse, leaving you with a surface that feels more like a stack of pancakes than a single, seamless sheet of glass.
Traditional Wood Finishing Methods for the Perfectionist
When you step into the realm of high-end restoration, you quickly realize that there is a massive gulf between a standard wipe-on finish and the mastery required for true excellence. While modern polyurethanes offer convenience, they lack the soul of traditional wood finishing methods that have defined cabinetry for centuries. To the perfectionist, it isn’t just about coating a surface; it’s about building a structural depth that interacts with light. This requires a deep respect for the medium, understanding that you aren’t just painting a piece of furniture—you are sculpting with light and resin.
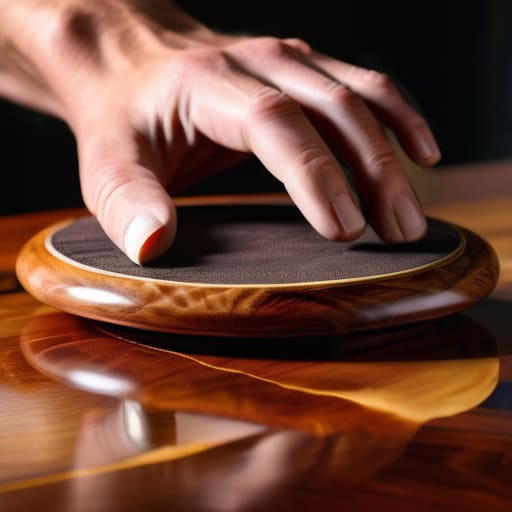
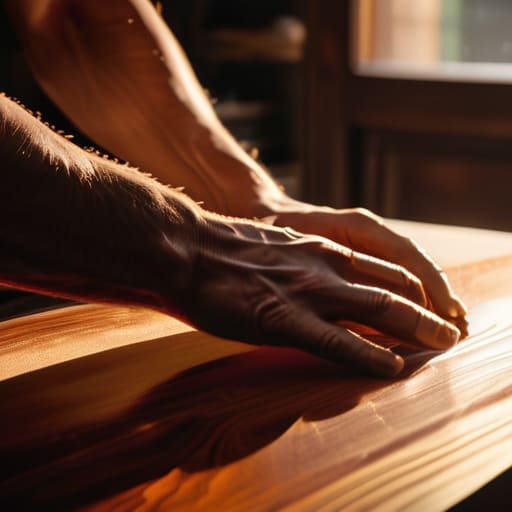
Achieving that elusive, glass-like glow isn’t a matter of luck; it’s a disciplined dance of pressure and precision. You have to become intimately familiar with various shellac application techniques, learning exactly how much weight to lean into your pad to avoid dragging the finish. It’s a meditative, often frustrating process where the difference between a masterpiece and a muddy mess lies in your ability to read the wood’s reaction to the spirit. Patience is your most vital tool here.
The Real-World Nuances: How to Not Ruin Your Finish
- Stop rushing the drying time. I know it’s tempting to keep building up those layers, but if the previous coat hasn’t fully set, you’ll end up dragging the shellac around and creating a gummy, sticky mess that’s a nightmare to fix.
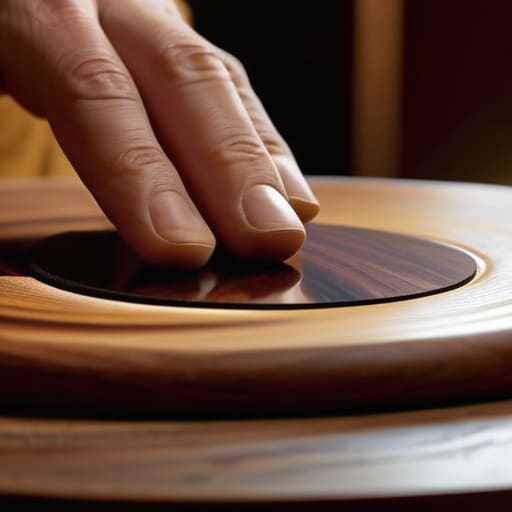
- Watch your pad’s moisture levels like a hawk. A pad that’s too wet will flood the grain and leave unsightly streaks, while one that’s too dry will just scratch the surface instead of smoothing it out. It’s all about finding that sweet spot of saturation.
- Don’t forget the “fad” maintenance. Every few layers, give your polishing cloth a fresh wipe or a light refresh. If you’re working with old, dried-up shellac trapped in the fibers of your pad, you’re essentially just sanding the piece with grit rather than polishing it.
- Master the art of the “lazy” stroke. You aren’t trying to force the shellac onto the wood; you’re trying to glide it. Use light, continuous circular motions and let the weight of your hand do the heavy lifting—if you press too hard, you’ll break the surface tension and leave divots.
- Keep a close eye on the ambient temperature. If your workshop is too cold or humid, the shellac won’t flow correctly, and you’ll deal with “blushing”—those cloudy, milky patches that make a high-end finish look like a cheap mistake.
The Bottom Line on Shellac
Forget the rush; the secret to that mirror-like depth isn’t the product itself, but the discipline of applying countless, paper-thin layers rather than trying to force a thick coat.
Understanding the chemistry matters—knowing how shellac reacts to alcohol and heat is the difference between a professional finish and a ruined heirloom.
Mastery requires patience and the right tools, moving away from modern spray cans to embrace the tactile, rhythmic art of the traditional hand-rubbed finish.
The Soul in the Surface
“French polishing isn’t just about slapping a finish on a piece of wood; it’s a conversation between you and the grain. You aren’t just building a barrier—you’re coaxing a depth out of the timber that no spray can ever replicate.”
Writer
The Final Burnish
At the end of the day, mastering French polish isn’t just about following a recipe of flakes and alcohol; it’s about understanding how the chemistry of shellac breathes with the wood. We’ve looked at how solubility dictates your flow, the nuances of spirit varnishes, and why the old-school methods still hold a candle to modern sprays. It’s a demanding process that requires you to respect the drying times and the delicate dance of the pad, but that’s exactly why the result is so unmatched. When you finally step back and see that unrivaled depth, you realize that every hour spent buffing was an investment in true craftsmanship.
Don’t let the steep learning curve intimidate you. There will be cloudy spots, there will be runs, and there will certainly be moments where you want to reach for a spray can just to save your sanity. But stick with it. There is a profound, almost meditative satisfaction in watching a dull piece of timber transform into something that looks like it’s trapped under liquid glass. French polishing is more than a technique—it is a way of honoring the material. So, grab your pad, mix your batch, and embrace the patience required to create something truly timeless.
Frequently Asked Questions
How do I know if I've applied too much shellac and risked a gummy, uneven finish?
The tell-tale sign is usually a tacky, “draggy” feeling when you run your hand over the surface. If your pad starts grabbing the wood instead of gliding, you’ve overdone it. You’ll also notice a cloudy, gummy buildup in the grain or a finish that stays soft long after it should have dried. If it looks like it’s sweating or feels like it’s made of syrup, you’ve built up too much too fast.
Can I actually use French polish on modern furniture, or is it strictly for high-end antiques?
Honestly? You can absolutely use it on modern pieces, but don’t expect it to behave like a standard spray lacquer. French polish is a temperamental beast; it’s sensitive to heat and moisture, so it’s a bad move for a coffee table in a high-traffic living room. But for a statement sideboard or a bedroom vanity? It’s magic. It breathes life into contemporary wood grains in a way that factory finishes just can’t touch.
What’s the best way to fix a mistake, like a dust speck or a scratch, without stripping the whole piece?
The Surgeon’s Touch: Patching Imperfections