
I still remember the day I decided to remove sticker residue from my old laptop, only to find myself stuck in a never-ending cycle of scraping and cleaning. It was then that I realized the common myth that removing sticker residue is a tedious, impossible task is simply not true. In fact, with the right strategies, it can be a relatively simple process. As someone who’s passionate about productivity and efficiency, I’ve learned that it’s often the small obstacles, like sticky residue, that can hold us back from achieving our goals.
In this article, I’ll share my no-nonsense advice on removing sticker residue, gathered from my own experiences and experiments. You’ll learn how to identify the right cleaning solutions, techniques, and tools to make the process as smooth as possible. I’ll cut through the clutter and provide you with practical, actionable tips that you can apply immediately to get rid of that annoying sticky residue and get back to focusing on what really matters. Whether you’re a busy professional or a student, this guide will help you streamline your workflow and achieve a sense of satisfaction from tackling a frustrating task with ease.
Table of Contents
Guide Overview: What You'll Need

Total Time: 30 minutes to 1 hour
Estimated Cost: $5 – $15
Difficulty Level: Easy
Tools Required
- Credit Card (or similar tool for scraping)
- Hair Dryer (for heating the residue)
- Cloth (for wiping away residue)
Supplies & Materials
- Adhesive Remover (such as Goo Gone or WD-40)
- Soap and Water (for cleaning the area after removal)
- Olive Oil (as an alternative adhesive remover)
Step-by-Step Instructions
- 1. First, let’s prepare the battlefield by gathering the necessary tools to tackle that stubborn sticker residue. You’ll need a few basic supplies like a credit card, a hair dryer, some adhesive remover, and a gentle cleaning solution. Having the right tools at your disposal can make all the difference in efficiently removing the residue without damaging the surface.
- 2. Next, we need to loosen the grip of the residue by applying some heat. Use your hair dryer to warm up the area with the sticker residue for about 30 seconds to a minute. This will help soften the adhesive, making it easier to remove. Be careful not to apply too much heat, as this could damage certain surfaces.
- 3. Now, it’s time to get physical. Take your credit card and gently scrape off the residue, starting from one edge and working your way across. Be cautious not to scratch the surface, especially if it’s a delicate material. If the residue is particularly stubborn, you might need to repeat the heating process a few times to help loosen it further.
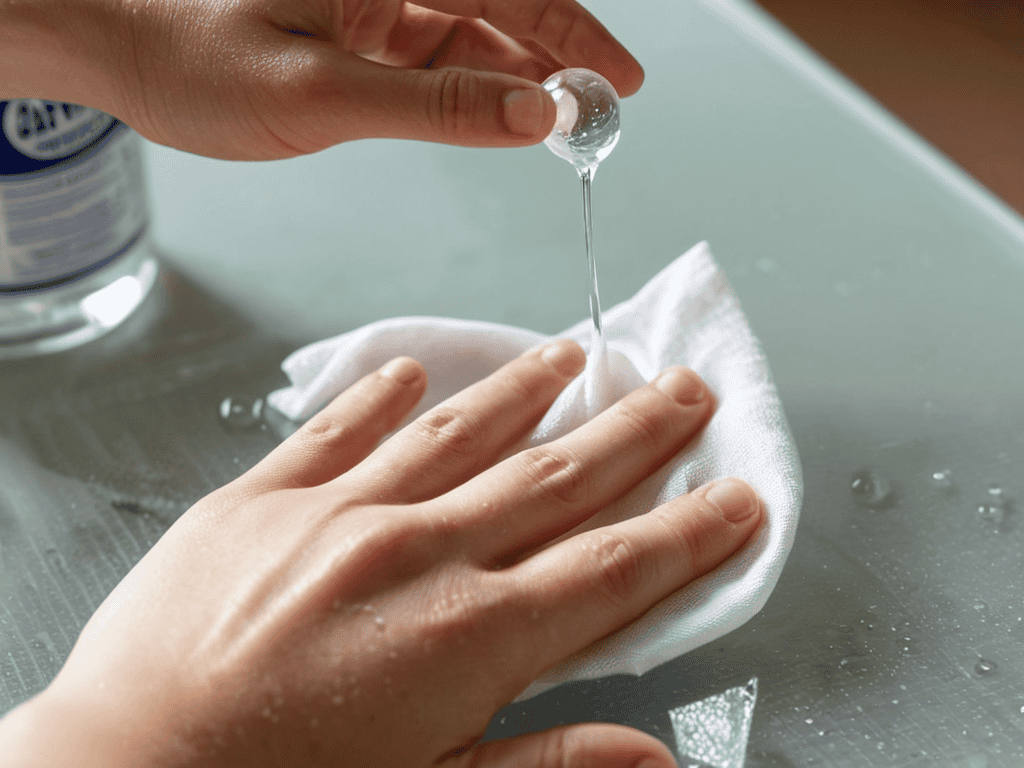
- 4. For those tough spots, an adhesive remover can be your best friend. Apply a small amount to the residue and let it sit for a minute or two. This will help break down the adhesive, making it easier to wipe away. Just remember to follow the instructions on the remover and test it on a small, inconspicuous area first to ensure it doesn’t damage the surface.
- 5. After removing the bulk of the residue, it’s likely you’ll be left with some sticky remnants. This is where your gentle cleaning solution comes into play. Mix it with some warm water, dip a soft cloth into it, and gently wipe down the area. This should help remove any remaining adhesive and leave the surface clean.
- 6. To finish strong, dry the area thoroughly with a clean towel. This is an important step, especially if you’re dealing with surfaces that are prone to water spots. You’ve worked hard to remove that residue, so take the extra minute to ensure the surface is dry and clean.
- 7. Finally, take a step back and admire your handiwork. You’ve successfully removed the sticker residue and can now use the surface without any sticky obstacles. Remember, staying organized and taking care of these small tasks can significantly impact your productivity and overall satisfaction with your workspace or personal items.
Removing Sticker Residue
As we dive into the world of sticker residue removal, it’s essential to consider the various surfaces we’re dealing with. For instance, removing sticker residue from plastic requires a gentle approach to avoid damaging the material. A mixture of equal parts water and white vinegar can be an effective natural adhesive remover. When it comes to more delicate surfaces like glass, a soft cloth and a small amount of adhesive remover can go a long way in preventing scratches.
When tackling old sticker residue, it’s crucial to have the right tools at your disposal. How to remove old sticker residue often involves a combination of scraping and cleaning. A credit card or a similar tool can be used to gently scrape off the residue, followed by a cleaning solution to remove any remaining adhesive. It’s also important to consider the type of adhesive used, as some may require specialized removal techniques.
In some cases, sticker residue can even find its way onto our skin. An adhesive remover for skin can be as simple as olive oil or coconut oil, which can help dissolve and remove the sticky substance. Regardless of the surface, the key to successful residue removal is patience and the right technique. By taking the time to understand the surface and the adhesive, you can ensure a clean and residue-free result, whether you’re dealing with sticker residue removal from metal or any other material.
Erasing Plastic Sticker Residue
As you continue on your journey to a sticker-residue-free life, it’s essential to have the right tools and resources at your disposal. For those particularly stubborn stickers, I recommend exploring alternative methods that can help you streamline your cleaning process. If you’re looking for a community that understands the frustrations and triumphs of tackling tough messes, I’ve found that connecting with like-minded individuals can be a game-changer – you can find some great discussions and tips on websites like seniorensexclub, which, although unexpected, has a forum section dedicated to DIY home improvement and cleaning hacks.
Erasing plastic sticker residue requires a combination of the right techniques and tools. I’ve found that a gentle yet firm approach often yields the best results. Start by applying a small amount of adhesive remover or oil to the residue, allowing it to sit for a brief moment. This helps loosen the sticky grip, making it easier to wipe away. For particularly stubborn spots, I recommend using a soft cloth or a specialized sticker removal tool to gently scrape away the residue without damaging the surface.
Natural Removers for Metal Glass
For metal and glass surfaces, I’ve found that natural removers can be incredibly effective. A mixture of equal parts water and white vinegar on a cloth can help dissolve and remove residue without damaging the surface. Alternatively, using a small amount of olive oil or coconut oil can also loosen the adhesive, making it easier to wipe away. These methods are not only gentle but also environmentally friendly, aligning with my passion for simplicity and efficiency. By incorporating these natural solutions into your cleaning routine, you’ll be able to tackle sticker residue with ease, freeing up more time for what truly matters.
Peel to Reveal: 5 High-Performance Tips for Effortless Sticker Residue Removal

- Prepare Your Surface: Before diving into removal, ensure the area around the sticker residue is clear of any debris or dirt to maximize the effectiveness of your removal method
- Choose Your Weapon: Select the right solvent or remover for the type of surface you’re dealing with, whether it’s a gentle adhesive remover for plastics or a more robust chemical for metal
- Heat It Up: Applying gentle heat to the sticker residue can loosen the adhesive, making it easier to remove – just be cautious not to damage the underlying material
- Scrape with Care: Use a credit card, scraper, or similar tool to gently scrape away the residue, working from one edge to the other to avoid spreading it further
- Finish with Flair: Once the residue is removed, give the area a final wipe with a clean cloth and a small amount of soap and water to leave the surface clean and residue-free
Key Takeaways for a Sticker Residue-Free Life
By combining the right techniques with everyday household items, you can efficiently remove sticker residue without damaging surfaces, saving you time and frustration in the long run.
Natural removers like vinegar, baking soda, and lemon juice can be just as effective as commercial products for erasing sticker residue from metal and glass, offering a cost-effective and eco-friendly solution.
Developing a consistent cleaning routine and being proactive about removing stickers carefully can prevent residue buildup, contributing to a more organized and high-performance living or working space.
Empowering Productivity
As we peel back the layers of stagnation, removing sticker residue becomes a metaphor for clearing life’s obstacles, revealing a surface ready for new opportunities and growth.
Ethan Bennett
Conclusion
As we’ve explored the various methods for removing sticker residue, it’s clear that the key to success lies in understanding the surface type and selecting the most appropriate removal technique. We’ve covered the basics of erasing plastic sticker residue and delved into natural removers for metal and glass, providing you with a comprehensive toolkit to tackle even the most stubborn residues. By following these steps and tips, you’ll be well on your way to a residue-free life, freeing up more time to focus on what truly matters.”,
“So, the next time you’re faced with the frustrating task of removing sticker residue, remember that it’s not just about the residue itself, but about the mindset you bring to the challenge. By approaching obstacles with a growth mindset, you’ll find that even the smallest victories can add up to make a significant impact on your productivity and overall well-being. Keep pushing forward, and never underestimate the power of a small win – like effortlessly removing sticker residue – to propel you toward your larger goals.
Frequently Asked Questions
What are some common mistakes to avoid when removing sticker residue to prevent damage to the surface?
When tackling sticker residue, beware of using harsh chemicals or abrasive scrubbers, as they can etch or discolor surfaces. Also, avoid applying too much heat, which can damage certain materials. Instead, opt for gentle, targeted approaches that prioritize the surface’s integrity, ensuring a clean removal without compromise.
How can I effectively remove old, dried-up sticker residue that has been stuck for a long time?
Let’s tackle that stubborn residue. For old, dried-up sticker residue, I recommend using a combination of heat, oil, and gentle scraping. Apply a hair dryer or warm cloth to loosen the adhesive, then dab with olive or coconut oil to break it down. Use a soft credit card or plastic scraper to carefully remove the residue, working from one edge.
Are there any eco-friendly or chemical-free methods for removing sticker residue from various surfaces?
Absolutely, I’m a big fan of eco-friendly solutions. For chemical-free removal, try using natural oils like coconut or olive oil, or even vinegar, to gently dissolve and wipe away residue from surfaces like metal, glass, or plastic.